I have managed to do a bit of modelling over the last week, I needed a pick-up and a van for my new rules so I did some really quick apocalypse style adjustments on a couple of old vehicles I had ready for this, nothing special but good enough to use in some games and for some photo’s for the rules once I’ve painted them.

I put mesh on the windscreens and armour all-round the van and added protection for the doors at the front and back and added a weapon on the roof.
For the pick-up I added some mesh again on the windows and armour front and back, then I added a simple structure to give some protection for anyone in the back.

But… There’s always a but!!
I also needed a truck and specifically a fuel tanker and I wanted something that resembled the big rig in the Mad Max film and well I don’t have one and I needed this again for some photo’s for the rules, but also so that I could play one of the scenarios I want to do which would be an attack on a tanker as it tries to get across the board, Mad Max style!!
So looking through the small box of matchbox and kids cards, the only thing I had was an old front end of a truck that was a little battered with wonky wheels but no trailer and definitely no tanker.

After adding a few bits to give it a more Mad Max look I then thought about the back end… and well I would have to build it from scratch.
I had a few ideas and also look on the internet to get some more ideas and finally with what I wanted I started to build the trailer.
This was scratch built using plasticard, I used two strips of 3mm to give it some strength so that it wouldn’t warp or bend during my games, to these I fixed some 0.75mm plasticard and made the main underneath of the trailer, I also used a couple of off cuts of plastic sprue one for the bumper things at the back and one for the leg / connector at the front.

To this I added a bed of plasticard and made up an edging of the same card and inside this I fixed a layer of coffee stirrers to give it a nice wooden top.

On the front section I added a box and the neck of an empty primer bottle for the firing position at the top! I added spikes around the edge which would hopefully look like old pieces of metal cut into spikes and had been welded there.
I did add eight 3D printed wheels to this as I couldn’t scratch build them and gave them a simple mudguard covering made from plasticard.
I then spend a couple of hours looking around the house trying to find something that I could use as a fuel tank to go on the back, I looked at an old toothpaste pump which was almost empty but it was too round and thin for the look that I wanted and I even tried to cut two empty plastic primer bottles but they just didn’t look right, after dismissing a few more unsuitable objects I spotted the good old go-to thing… an empty toilet roll tube 😉
I have used these before covered in some texture paint as large concrete pipes for my 28mm scenery, but the question was could I use one as the tanker section of the truck?
Well squashing the roll down slightly it had the look I was after, but it was no good looking like cardboard ( or concrete! ) so I had to work out what to do with the outside.
So first thing I did was cut two oval shapes out of plasticard to seal the ends and to help the roll keep the shape I wanted, this was a little fiddly to get it right and to stick in place! But after a few failed attempts and stuck fingers I finally did it and had a cup of coffee to relax after all the stress! 😉
Well the question now was, what was I to do with the outside?
Just paint would not look right and covering it with some sort of filler wouldn’t be great either, also probably hard to do… I eventually decided to cover the outside of the roll with some very thin plasticard.
I had a small amount of 0.25mm plasticard left and luckily it was just enough, so sticking one edge to what would be the bottom of the tank I wrapped the plasticard around the tube sticking it as I went and what I ended up with was this…
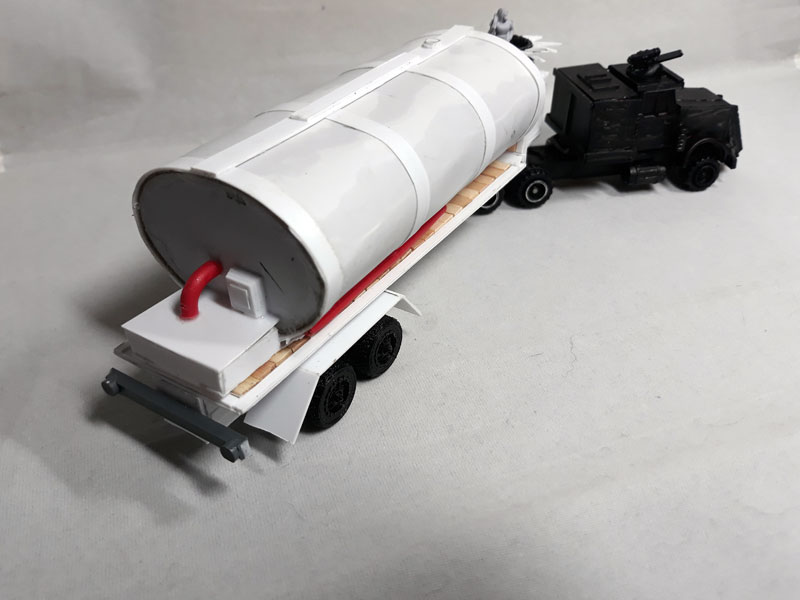
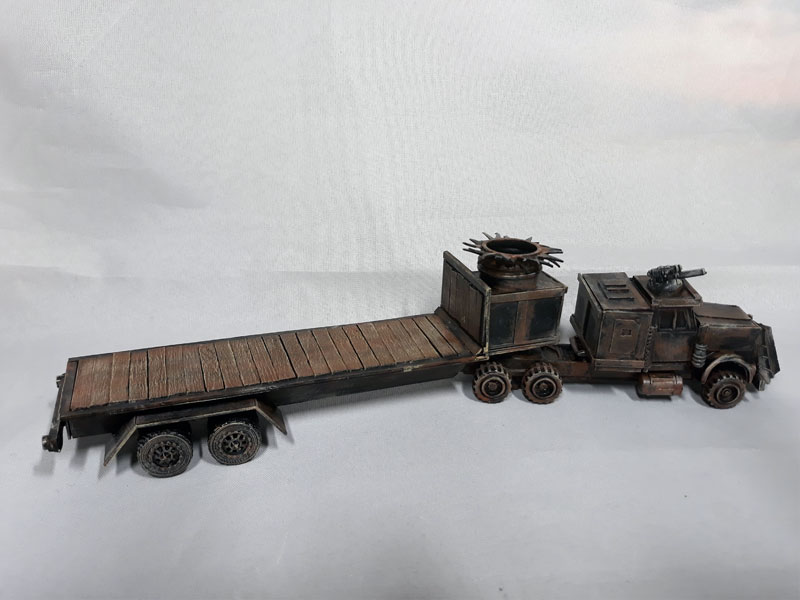
A few little bits of extra plasticard to give it a little detail and a box and a pipe or two on the outside and it was ready for painting, but I then decided to not stick the tank to the trailer bed.
This was mainly because I liked the wooden bed of the trailer and thought I could use it as a normal lorry as well as a tanker if I didn’t stick the tank to the back, this would give me a couple of uses for the one truck.
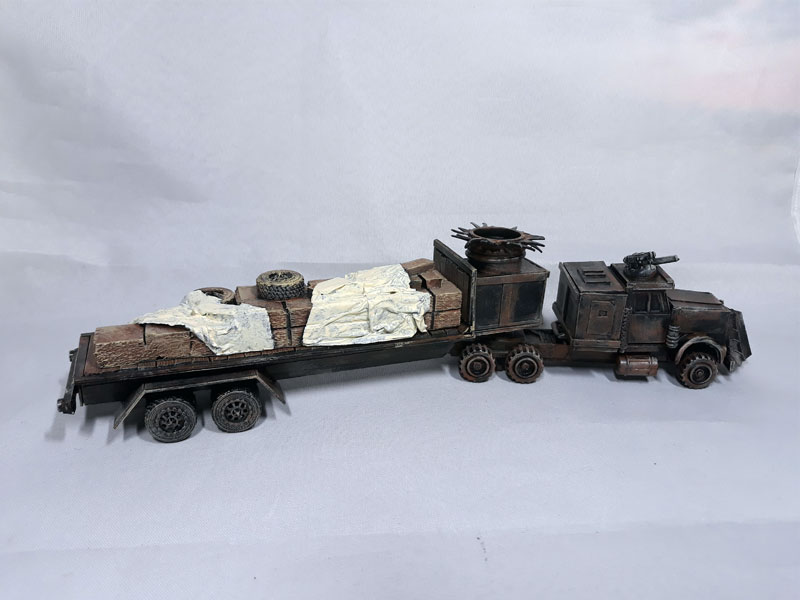
I could use it without the tank on the back as a empty truck and I could put a car or two on the back as a transporter, then I thought about using it to carry supplies as well so I put together some boxes and tyres and a couple of tarpaulins to give the look of a good load for the trailer.

The boxes are just small pieces of balsa wood, the tyres again are 3D printed and the tarpaulin is just tissue paper soaked with slightly watered down PVA.
So now I have three options for the truck, plus the supplies also make a piece of terrain when not on the back of the trailer! 😉
So after a quick paint job I have this…

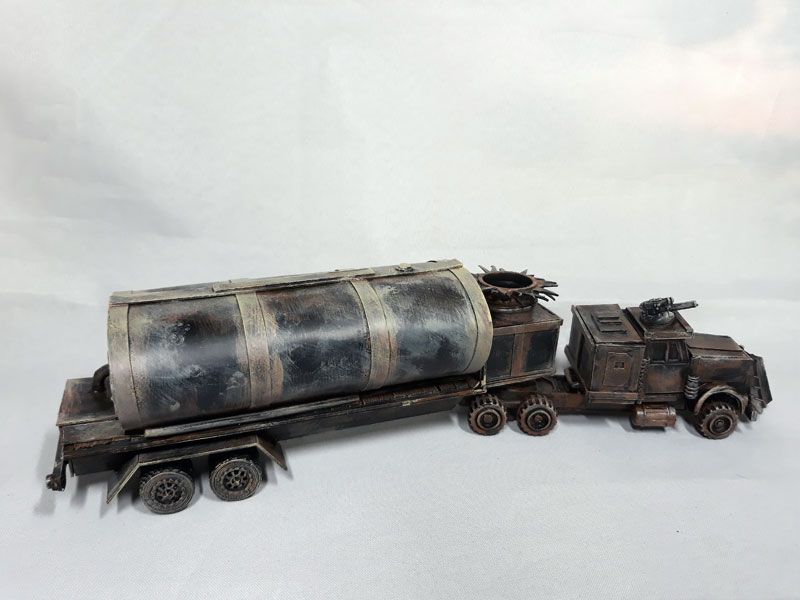

So here is a group shot of the fuel tanker with its escorts in the middle of an ambush on a trip through wastelands…

Very nice work, love the idea of different loads for the truck, and very well executed too!
Cheers Roger.
Thanks, it was fun to do.
I realised that I wouldn’t be getting any more trucks anytime soon so had to make the most of this one and I think three options is not bad.
Mac
They all look great! I especially like the tanker and the different loads you can put on it. The vehicle color schemes and weathering are very well done.
Hi John,
Thanks I am glad you like them, they were good fun to build.
I only had one truck so needed a way of having “more than one truck” if you see what I mean, the empty trailer was the only way I could think of doing it.
The paint work is my usual rubbish attempt, very quick and nasty!! with washes and drybrushing.
But they don’t look to bad on the table ;O)
Mac