The ash storms over Khepri Ridge had barely settled when the long-range scanners of the United Earth Federation picked up movement in the deserted city below. Two UEF heavy assault mechs — Alpha One and Charlie Two — were dispatched to investigate what command believed was a small raiding party from the Galactic Resistance Front.
Instead, hidden among the empty buildings, a full GRF armoured spearhead lay in wait.
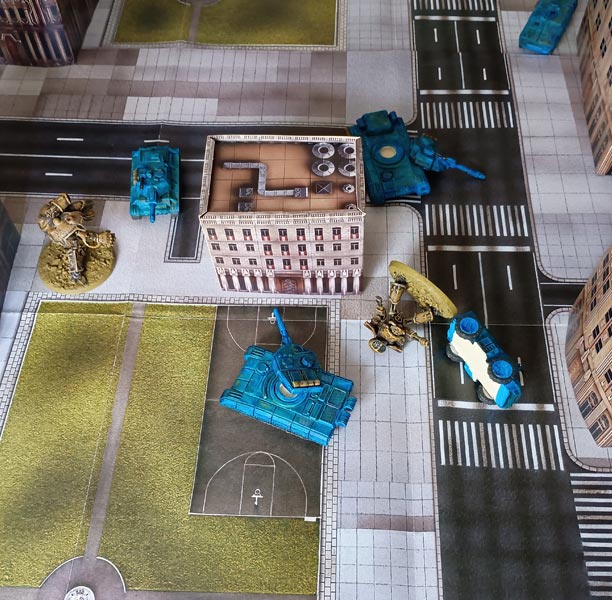
Three heavy tanks rolled out from concealment while two APCs raced toward the central hab-blocks, disgorging infantry squads under the command of Captain Varek. Within moments, GRF troops flooded the upper floors of the buildings, rocket launchers hammering down onto the advancing mechs from above while the tanks closed in for the kill.
Caught in a deadly crossfire, the UEF machines fought desperately through the streets…
_________________________________________________________
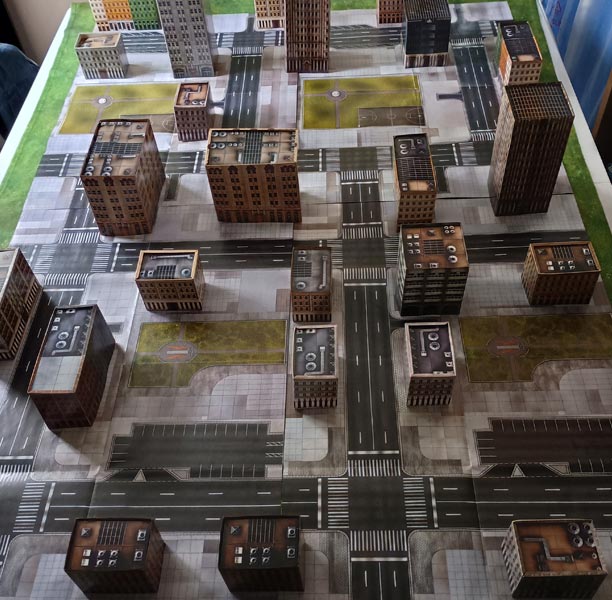
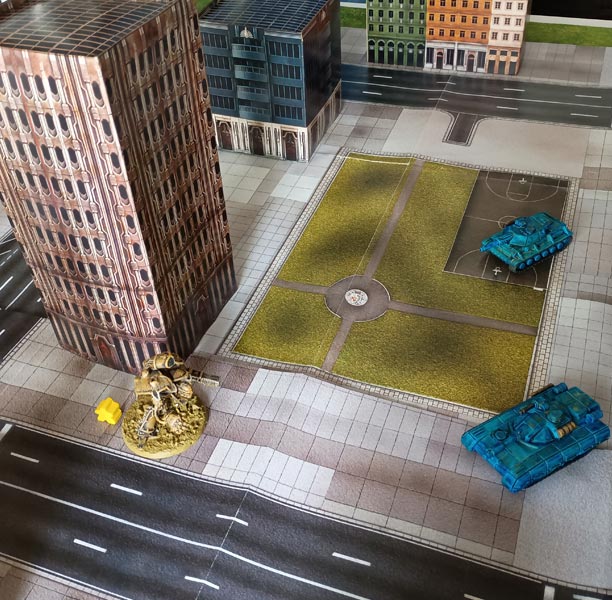
I finally managed to get a chance to set up a battle, this time I wanted to playtest some simple rules for fighting in and around buildings, this is something that is missing from the main rules so I got out my city scenery and some figures and started a simple city battle.
The forces I chose were, for the UEF – 945 points
Sentinel Combat Mech Alpha-One with Ace Pilot and Up-Armoured upgrades, with a Balistic Lance, Burst Coilgun and a Heavy Kinetic Blaster.
Vanguard Combat Mech Charlie-Two with Precision Marksman and Self-Repair Cycle, with Heavy Pulse Cannon, Burst Coilgun and a Multi Launcher.
For the GRF – 1,050 points
Captain Varek, two Light Infantry squads both with Squad Launchers and two APCs with Burst Coilguns.
Three Heavy Tanks all with Plasma Cannons and Burst Coilguns.
As there was only 10 units in the battle, I was going to be drawing 3 activation dice per turn.
Turn 1
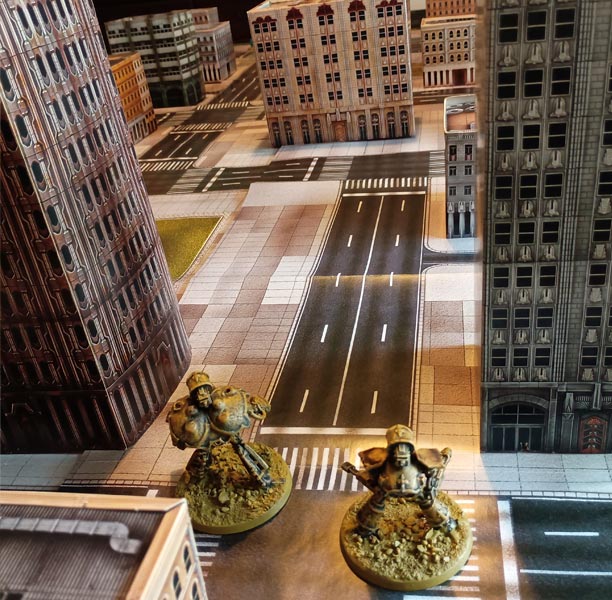
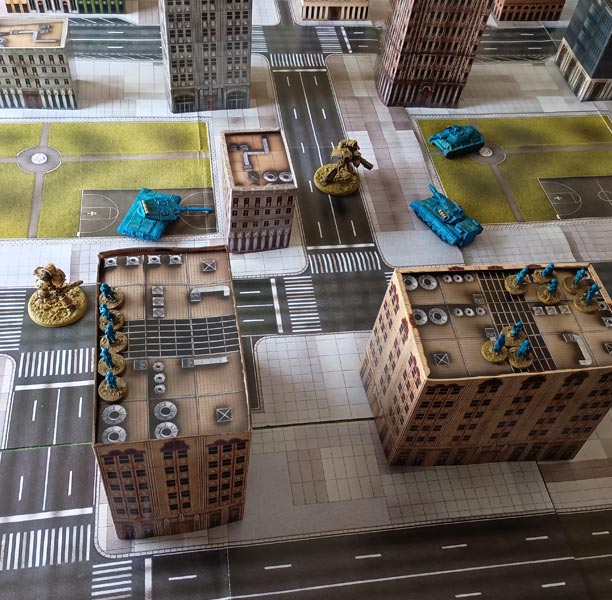
Both of the mechs moved cautiously towards the centre of the table looking for the GRF units.
Captain Varek sat in his APC with one squad of infantry and moved towards the middle of the table just behind two of the tanks, while the other APC and infantry squad followed the other tank on the left.
Turn 2
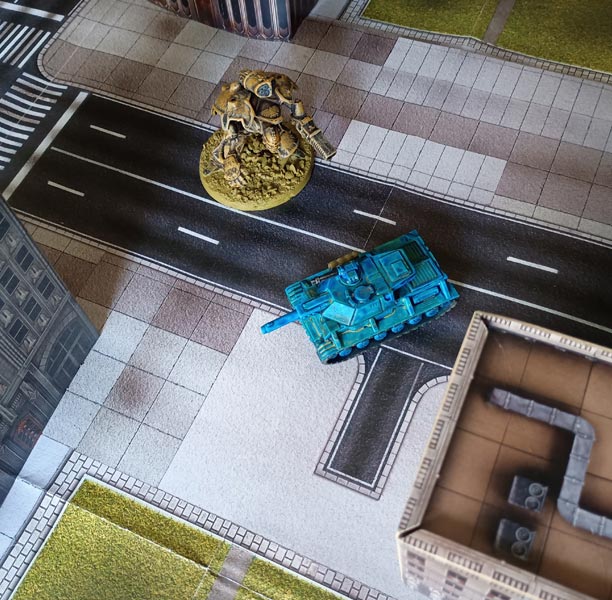
The mechs saw the heavy tanks and started to move together towards the left side of the table.
Alpha-One had the Up-Armoured upgrade, which slowed it down. The pilot was an Ace Pilot, which countered this slightly, but it was still the slower of the two mechs. This was going to make it harder for Charlie-Two to support Alpha-One on the left side of the table.
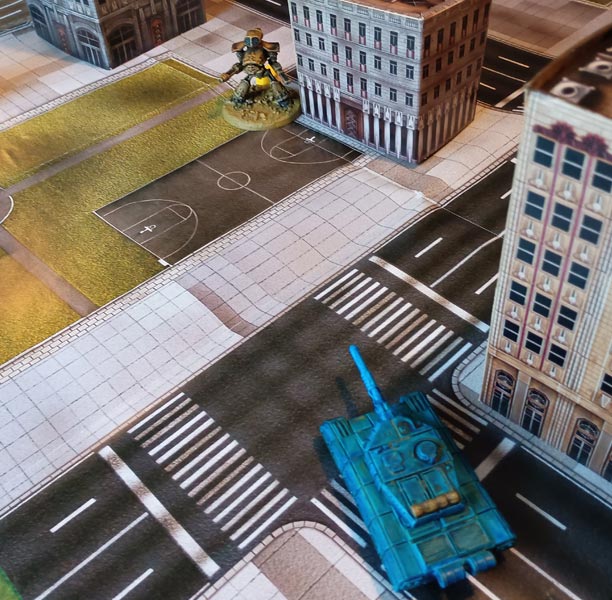
The APC’s started to drop off the infantry so they could get into the buildings and the tanks powered forward towards the two mechs.
Turn 3
Well, I think the dice gods were on their tea break for a lot of this battle! I rolled a huge number of 1’s and 2’s in this game (remembering that Hostile Actions uses D20s). Almost every shot from both sides this turn either missed or failed to penetrate armour.
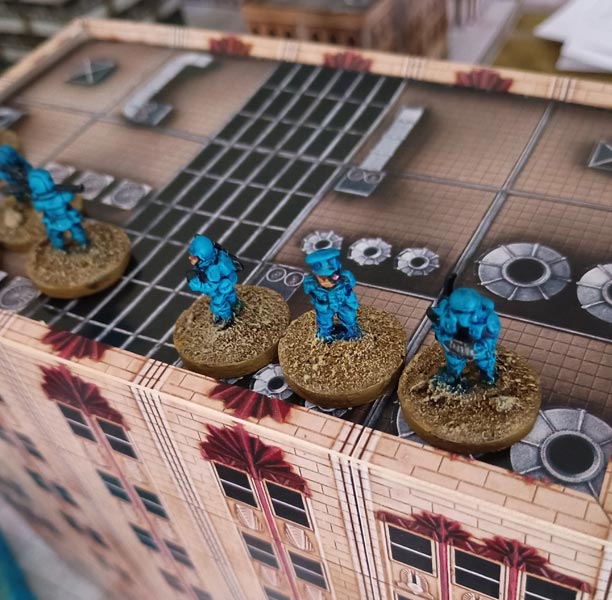
The infantry on the left made it to the building they had marked as their firing point, next turn they could make it to the roof.
The infantry and Captain in the centre were still a little short of the building they wanted (I did make the mistake of getting them out of the APC too early)
Alpha-one came closer to the tank on the left side of the table and they both exchanged fire, again everything missed!
Turn 4
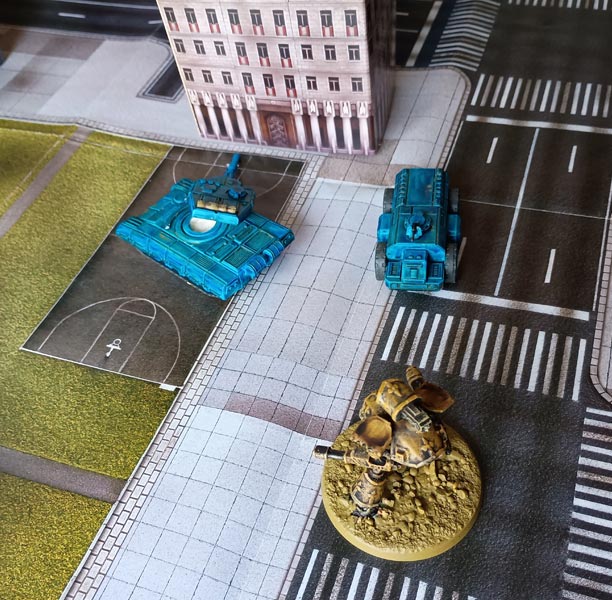
This turn saw some heavy damage on the tank on the left side, Alpha-One finally found its target, a critical hit forced the tank to move forward out of control, its drive gear was hit… Yep, I rolled another 1 on the Critical Hits table.
Still at least one of the mechs was starting to do some damage.
The other two tanks fired at Charlie-Two with one of the big guns finding its mark, doing enough damage to cause the big mech some concerns.
Charlie-Two failed to hit with all of its return fire on the tanks.
The first squad of infantry got into position on the roof of their building and wasted no time setting up their squad launcher. They managed to hit Alpha-One, but the shot failed to penetrate its armour.
The other squad and had finally reached the top of the building they had marked as their firing position, with the captain close behind.
Turn 5
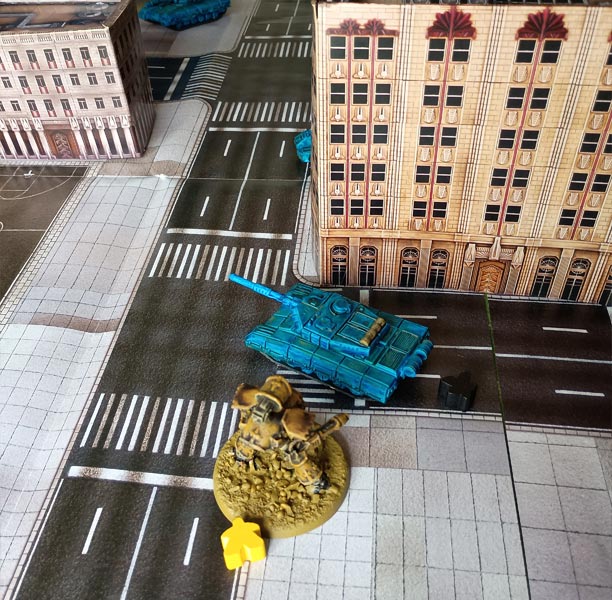
And the tank on the left is destroyed from some deadly shooting from Alpha-One, one of the GRF APCs moves in to fire a couple of Burst Coilgun shots into the big mech, and scores two hits!
The squad on the roof of the building on the left side of the table launches another rocket into Alpha-One and manages to immobilise the big mech… things are not going as I had hoped for the two mechs. Those squad launchers are starting to hurt!
Charlie-Two takes a couple more shots into its armour taking some light damage, the pilot returns fire and almost destroys another tank with some great shooting.
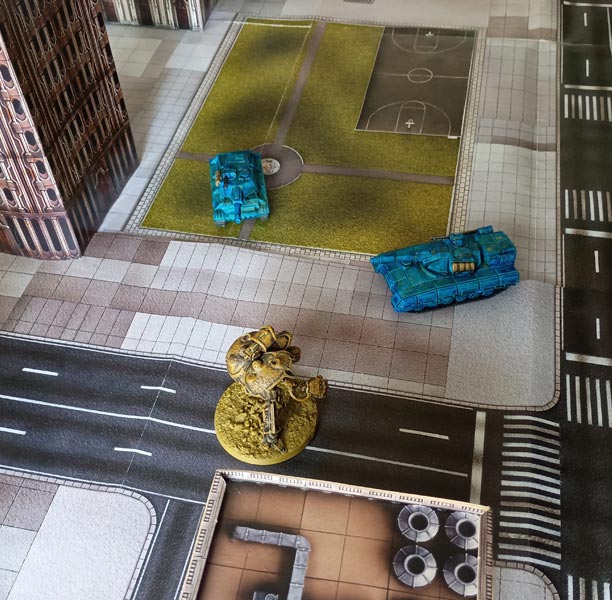
The second squad is now in position on the roof overlooking the fight between Charlie-Two and the two tanks, and they launch a rocket and destroy Charlie-Two’s Burst Coilgun.
Alpha-One tries to hit the squad on the roof that just hit Charlie-Two with the mechs multi-launcher but misses completely, but then manages to destroy the APC.
Turn 6
Alpha-One’s pilot ejects from the mech a split second before another infantry rocket tears into the machine. The pilot lands far enough away to safely escape the battle.
Charlie-Two moves in on the last tank and fires everything it can at close range taking the tank out of the action.
Captain Varek looks at the situation, his infantry squads are dishing out some pain, but now the tanks are not there to take the fire from the remaining mech, he knows his infantry will stand no chance on their own, so he decides to call all the remaining troops to retreat.
Well, that was fun!
The two mechs almost didn’t survive. The three tanks were dangerous enough, but with those squad launchers hitting them as well, things could easily have gone very badly for the UEF.
My dice rolling was terrible as always — I think the GRF just suffered slightly more from the bad luck than the UEF did. I rolled a ridiculous number of 1’s and 2’s throughout the game.
I’ve now managed to get some of the basic rules working for moving into buildings, fighting around them, and firing from elevated positions. Next I need to look at close combat inside buildings, as well as rules for shooting at and damaging structures themselves.
I’m hoping to release these rules for free once they’re finished. I’m also thinking about adding Mercenary rules to expand the options even further, along with any suggestions I get from people on the Discord server.
So keep an eye out for updates here, or pop over to the Little Wargaming Worlds Discord server where you can follow development, discuss the rules, or just chat with other gamers.
You can find the server link under the Community tab on this site.
Enjoyed the battlereport! Glad to see the mechs chasing off the GRF and holding their own. Building rules can be fun, especially destroying them!
Hi Jack,
Thanks glad you liked the report.
The building (city) rules are taking shape, still a lot to do though.
Mac