Well I had another great game at the club this week, I joined three mates and played a game of 1st edition Disposable Heroes, the WW2 unit skirmish game ( that’s what it says on the front cover! )
I have been told that this is an old rule set ( and I am only playing version one ) but I really really like this game.
There are some really good things in the rules, including how the unit activation works.
In Disposable Heroes you roll a D10 for initiative at the beginning of each turn to this you add the highest ‘Guts’ in your force then -1 for any units that are pinned and -1 for any destroyed units, the side with the highest score decides if they activate first or second.
Each side activates one unit or vehicle etc. then does all the movement and shooting for that unit then passes over to the opponent who activates one of his units, with the activation going backwards and forwards like this until all the units have been activated on both sides.
The process starts again at the beginning of each new turn.
Another great thing in the rules is how firing at an enemy really makes them think ‘what they hell are doing on a battlefield being shot at!!’
I haven’t played a game that comes close to getting this right during a battle, but for me Disposable Heroes really does come pretty close…
Each time a unit gets shot at ( even if it takes no casualties ) it has to take a Guts check to see if it is pinned or even falling back, this check is done against the highest Guts in the unit either the sergeant or corporal etc. or even an officer, this score is adjusted by the weapons Moral Modifier and this is cumulative!
So if a Sherman decided to fire two of its 30.cals ( Hull / Pintle ) at an enemy infantry unit it would get a Morale Modifier of -2 from each giving a -4 from the infantry units Guts score, if the unit is already pinned this would take a further -1 form the units Guts score.
Then you would need to roll under the adjusted Guts score on a D10 to pass, if they fail then they are pinned if they fail again they could run away or at least run to cover… it is a little awkward at first as there are a few modifiers, but once you get it clear in your head the system really makes things seem real ( in game terms ), this makes suppression fire really work!

For this game I played on the side of the US against a hidden German force defending a small village, the US had an armoured infantry platoon with some supporting MMG’s, plus a Sherman and a M8 armoured scout car.
We had no idea what the Germans had in the village…

There were some real tense moments as the US halftracks moved forward trying to spot any hidden troops ( I just need to point out that we ran out of normal halftracks for the US troops so we had to use an anti-aircraft one and a mortar one, but we counted them as normal halftracks for the game )
My Sherman started forward cautiously and put some machinegun fire into a German MMG crew, this managed to keep their heads down.
A couple of the halftracks moved forward and the troops on board got out and ran for cover by a low stone wall, instantly taking fire from a hidden German sniper in the upstairs of the farmhouse.

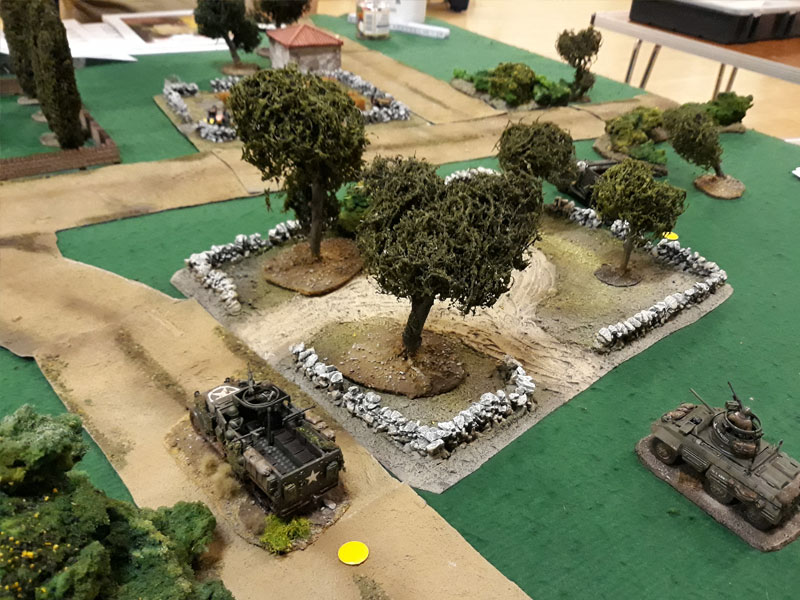
Then a halftrack on the right-hand side of the table drove straight into an ambush ( its is the one hidden by the trees in the above picture ), a hidden Panzerschreck took out the US vehicle and every one riding inside, ouch that hurt a full squad died in the halftrack without firing a single shot.
Then another halftrack moved forward on the main road approaching the village and was ambushed by a Pak 40 anti-tank gun, but the German gun crew were so excited about catching the halftrack in the open that they missed completely!!!
The US infantry unit on board said a few quick prayers and dived out and then fired a few shots at the German gun crew hunkered down behind the weapons gun-shield, and managed to pin them.

I then kept my Sherman stationary and fired everything it had at the Pak 40, and this time killing one of the crew and forcing the rest to leave their gun and fall back into the trees for cover.

My troops on the left decided to move around into a muddy field but ran straight into a hidden German infantry squad that had two Panzerfausts!!!
Another halftrack went up in smoke!
The machine gun crew that was inside the vehicle dived for cover behind a stone wall, but the German infantry squad had a MMG team with them as support and they made short work of US troops.

Keeping my Sherman stationary meant it was a fair way behind the rest of the remaining units so it had to move forward to try and give them some support so I moved it to the left and towards the German troops that had just destroyed my halftrack and crew.
I decided to fire everything that I could at the Germans and managed to kill one and pin the squad.
Then the remaining small squad by the burning halftrack in the centre of the road fired at the German sniper in the building and managed to give the guy a new parting in his hair!!!
Anything except a 9 or a 10 on a D10 was needed to kill the sniper and my mate rolled a 10 and missed…
Oh that did cause a little merriment from the German side of the table 😢
At the end of the night we were not sure who had won, but it didn’t really matter as the game was such great fun.
The US had lost one full infantry unit and three halftracks, a 30.cal team and a few other figures and the Germans had lost a few support bits, Panzerschreck team, MMG team, the Pak 40 crew were still hiding in the woods, and they had lost a few figures from another infantry unit, but they didn’t have much else left on the table.
So a very close game, I like to think that if we had enough time the Sherman would have started to add it’s weight to the fight more so we could have put the US in front.
I really like these rules, they have some great mechanics, the one thing that makes the game a little awkward to play is finding things in the rule book during the game!!
To be honest it is not great, things are a little jumbled up and their positioning in the rules doesn’t really make sense.
I have found one or two good looking Quick Play Sheets on the internet so hopefully they will help speed the game up a little.
As I said at the beginning this is the 1st edition of these rules, I will be sticking with them as I can’t see me ever paying $30 for a PDF of the 2nd edition version.
I am now going to point up my WW2 British and Germans and see how they work with the points system in the rules, I don’t have masses of 28mm figures and vehicles so they should work ok as skirmish / platoon sized games.
I do have a load of unpainted US troops and Finn’s so I could add two different armies if I ever get around to painting them.
All of the above armies will be great for the platoon sized games, but I could use my 20mm WW2 figures and vehicles if I wanted to get more stuff on the table for that all day bigger game 😉